In part one of our wood floor restoration series we have already shared with you a couple of the most common reasons for your wooden flooring to look and feel sad and tired. We are always all for effective and preventive maintenance, but we also know that accidents can happen to anyone and they will be always a bad thing you have to deal with properly, no matter if your floor comes on high or low price, it is prime or rustic grade and it is newly installed or an older one. Today we are continuing to help you figure out and beat the most common issues and problems with a long-lasting effect and extra protection added.
Peeling a bubbles
If your hardwood floor faces peeling or bubbling, it is maybe because you are using two incompatible products. For example, applying polyurethane finish to a floor that has previously finished with wax, one of these “effects” may appear sooner or later. When your floor is previously finished with wax and you decide to re-finishing it, always be sure that all the residue is removed completely, because the wax is most probably going to stop the new finish from drying properly.
In general, every time you decide to refinish a wood floor, you have to know what the previously used finish is. If you still cannot tell for sure, be sure to ask the experts and they will help you determine the old finish. Applying a water-based finish over an oil-based stain will lead to the same problems. Always be sure to use products with the same base, because they can combine and be effective instead of taking from the effectiveness of each other.
Refinishing an oldie
With time and due to many reasons, but mostly because of high traffic, heavy footfall and a lot of everyday use, your wooden floor will start to transform its look and appearance and this transformation will be negative, for sure. No matter how well you maintain it and how strong the protective finish is, wood gets worn with time and you will want a bit of a facelift and pamper for your beloved floor. In a nutshell, refinishing consists of removing the dull and worn finish and applying a new one. As easy as it sounds, it can also lead to a few issues, if you do not do it properly. For example and as we have already said, you have to know what finish you have to work with and the existing finish of your floor.
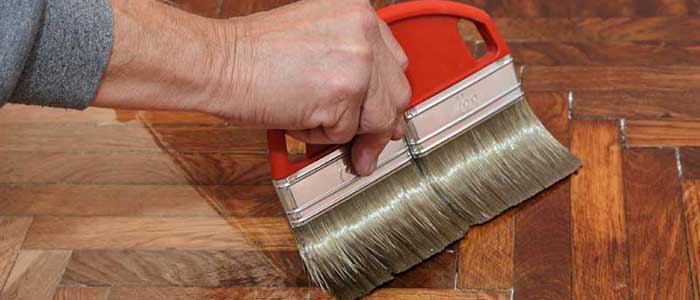
In case you have one of the most widely used finishes, the polyurethane one, here is how to prepare the surface properly for refinishing: start with expecting the surface and filling any gaps and holes and protruding any loosened nails if needed. Next is sanding, which will get rid of all the little imperfections on the surface and leave it smooth and even. Before starting with sanding, be sure you know how many times in the past the surface has been treated to avoid over-sanding.
Sand until all traces of the old finish are gone and continue with vacuuming carefully to remove all the remaining dust. Prime and seal the wood if needed and this is the right time to apply stain if you consider changes in colour. Next is the finish application and when a new coat of it an already dry, you can polish your floor with dry mop for an extra fresh look!
Be the first to comment on this post.