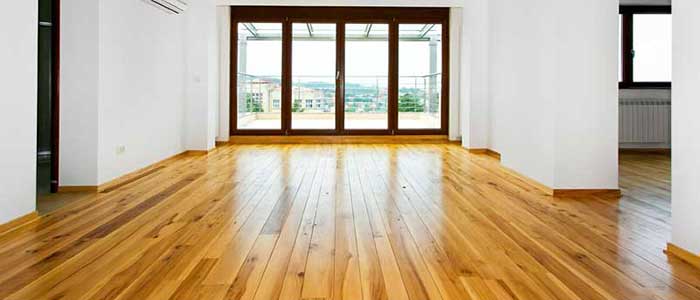
Natural-looking, oiled wood floors used to be highly popular for the last few years. However, this tendency slowly gives way to a new, or better to call it a recycled wood flooring trend – high gloss wooden floors. Although natural-looking wooden floors still win over the hearts of many clients and customers, high gloss is back with all its glory and beauty and it is about time to have a look at this option, if you are planning a wood floor installation or refinishing project.
One thing you have to be aware of, before considering a high gloss wood flooring is the fact that it can require a lot more maintenance than any other wood finish option in order to look flawless and extra clean. Keeping in mind this “little” detail is important because many people are very disappointed when they learn that beautiful floors require some effort and dedication. Thanks to its highly polished and perfect appearance, any fine chip, scratch or blemish stands out like a sore thumb. However, anything is worth it, because of the great and unbeatable appearance.
Do you want a wooden floor with an eye-catching and impressive gloss? Then there are a few recommendations from the experts! The first thing you have to consider is sanding. Sanding is recommended for both newly installed and unfinished floors as well as for older floors that are already treated and have a finishing product applied.
The purpose of the treatment is to smooth and even out the surface of the wood and get rid of old and worn-off finishes, scratches and little gaps and any other sort of imperfections that may ruin the uniform look of your floor. Once the wood is sanded its pores are open and ready for the next procedures and for the finishing and sealing products to be applied. The floor itself also needs to be sanded using very fine black paper in between adding layers of high gloss finish.
Here is what you need to do next:
- Once the surface is sanded as recommended, be sure that you vacuum as much dust and residue as you can (there will be a lot of dust!). Then wipe over with a soft and lint-free cloth that is soaked into the white spirit.
- The next thing that has to be done is the application of the base coat sealer. Work from the edges of the room inwards and start from the edge that is furthest away from the door of the room.
- Once you are ready and the sealer is dry, you can start applying the high gloss finish next. Make this the same way as you applied the base sealer and then leave it to dry for a longer period, for at least 5 hours. When the lacquer is wet, you can get a good idea of how your floor will look at the end and how shiny it will be. If you are happy with the shininess of the floor, be sure to apply 2 or 3 more covers.
Be the first to comment on this post.